DCO 6.1 - How to customize Application Document templates
You use the Application Document wizard to generate formatted documents that capture information about the application. Typically, you customize the standard document templates to meet your project and organization needs.
Customizing application document templates
The wizard uses the two Microsoft Word document templates - ApplicationDocument and ProjectDocument. They provide working samples that you can copy and edit to meet your company's documentation requirements. The templates are stored as Word Template rules.
| Template | Word Template rule | Focuses on |
|---|---|---|
| ApplicationDocument | PegaAccel-Task-DocumentApp.ApplicationDocument | Describing the structural rules and business elements of the application |
| ProjectDocument | PegaAccel-Task-DocumentApp.ProjectDocument | Describing project-related information, in addition to the application elements |
To customize a template and use the customized one in the wizard:
- Create a RuleSet to hold customized template rules, and add it as a production RuleSet to your application rule and appropriate access groups.
- Create a new Word Template rule to hold the customized Word document template.
- Edit the Word document template associated with that Word Template rule and save the rule.
Details for each of these three steps are below, followed by an example.
Examples of static content:
- Text (such as words and paragraphs)
- Images, pictures
- Headers
- Footers
Step 1: Create a RuleSet to hold customized template rules, and add it as a production RuleSet to the application rule and appropriate access groups.
Typically, you create a specific RuleSet in the system to hold such customized rules. When you create the RuleSet, specify that it requires the Pega-AppDefinition RuleSet.
- In the Rules Explorer, right-click SysAdmin and select New > RuleSet.
- In the New rule window, provide a name. Accept the defaults for the version and description.
- In the Requires RuleSet and Versions array, add Pega-AppDefinition:06-01.
- Click Create.
- Then, click
 in the form to save the new RuleSet.

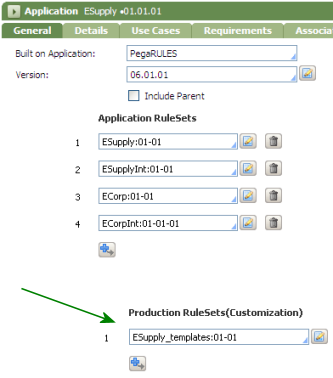
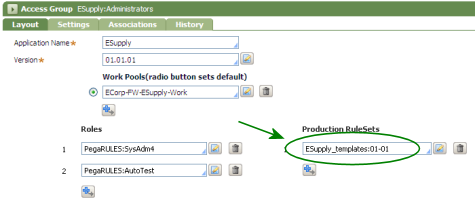
After creating the RuleSet, add it to the Production RuleSets array in the application rule for the application, and to the Production RuleSets array in the access groups used by those operators who use the customized templates.
Production RuleSet in the application rule:
Product RuleSet in an access group:
Step 2: Create a new Word Template rule to hold the customized Word document template.
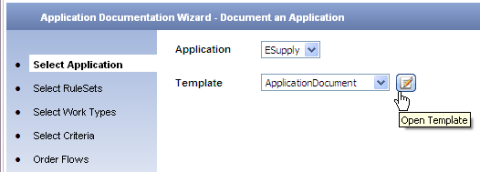
- In the Designer Studio, start the Application Document wizard (
 > Application > Tools > Document
 - On the Select Application tab of the wizard, select the standard template you want to customize in the Template drop-down list. Click
 to open its Word Template rule form.
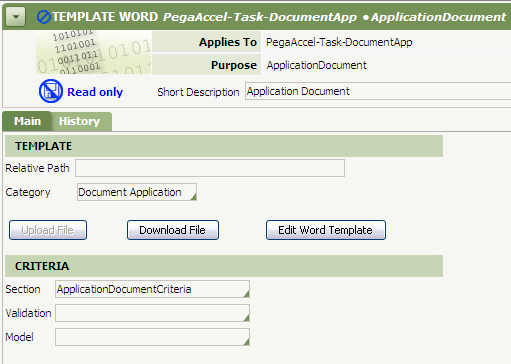
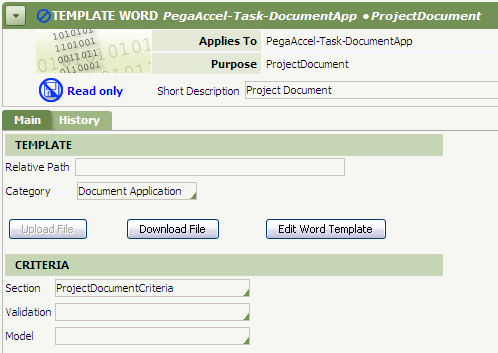
ApplicationDocument Word Template rule:
ProjectDocument Word Template rule:
- Click the Save As icon (
 ) to save a copy of the standard Word Template rule to your RuleSet. In the SaveAs window that opens, enter a new name in the Purpose field. Specify the RuleSet that you created in Step 1.

- Click the Save As button and the new Word Template rule form opens in the Designer Studio.
- Update the text in the Short Description field to indicate this is a custom template. Click the Availability icon (
 ) to change the availability to
 Yes. - Click to save the rule.
- Click Download File to save the Word template file to a location on your workstation so that you can edit it. (Optionally, you can change the file name when you save it to your local system.)

Step 3: Edit the Word document template associated with that Word Template rule and save the rule.
These instructions are based on Microsoft Word 2010. The approach is valid for Microsoft Word 2007 also.
Locate the Word file that you saved on your local system in Step 2 and double-click it to open it in Microsoft Word.
To easily see the locations in the Microsoft Word document that provide dynamic, system-generated content from Process Commander, turn on the field code display in Word:
- After the template file opens in Word, open the Word Options window in Word. (In Word 2010, click File and then Options. In Word 2007, click
 at the top left corner of the window, then click the Word Options button.)
 - Select Advanced, and in the Show document content section, enable Show field codes instead of their values and set Field shading to
Always.

- Click the OK button to return to the Word document. The content in the Word template file that is dynamically generated by the system when the Document wizard creates the output document is highlighted.

Within Microsoft Word, customize the document template:
- Alter the file's contents.
You can alter the appearance and static content your see in the Word document. You can add new content, such as text and images. You can change the default page headers, and add a footer. You can change the static text that is provided by default to something that meets your organization's needs. You can also delete the field codes for the system-generated content, if there is something you do not want included in your output documents.
Note: Before you delete any of the standard field codes, make sure to save a backup copy of the unaltered Word file. If your organization later decides it wants the default system-generated information included in the document, you can use the saved file to copy the default field codes and paste them back into your template.
The following table lists the most typical things that organizations change in the default document template. It is not an exhaustive list of everything that can be done in the file. Anything that one can typically do in a Word file can be done.
| Content type | Examples |
|---|---|
| Static images and pictures | Replace the default image on the cover page with your own.
Insert new images. |
| Static text (words, paragraphs, etc.) | Modify the text on the default copyright page.
Remove the copyright page. Provide a section of explanatory information, such as a Preface or Introduction, before the table of contents (Contents). |
| Page headers | Add a page header.
Change the default page header. |
| Page footers | Add a page footer. |
| Default field codes for system-generated content | Delete and replace with static text
Delete one altogether from the document that your know your organization will not need |
- Select the Save action in Microsoft Word to save your changes to the Word file.
- Close Word.
- In the rule form in the Designer Studio, click Upload file. Locate the file on your local system and upload it to the rule.
- Make sure the Category field in the rule remains set to
Document Applicationand the field remains set toApplicationDocumentCriteria. - Save the rule form ().
The next time you use the Document wizard, the custom template is available in the Template field on the Select Application tab:
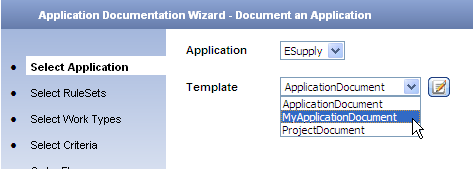
When you specify that custom template, the wizard uses it for the document it generates.
Example: Customizing the Application Document for ECorp
This example assumes knowledge of how to work with text, images, and headers and footers in Microsoft Word.
In this example, the ECorp company is developing the ESupply application. The organization wants the following customizations:
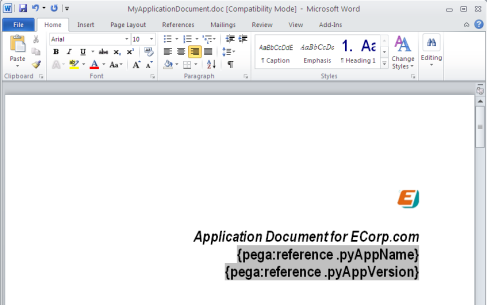
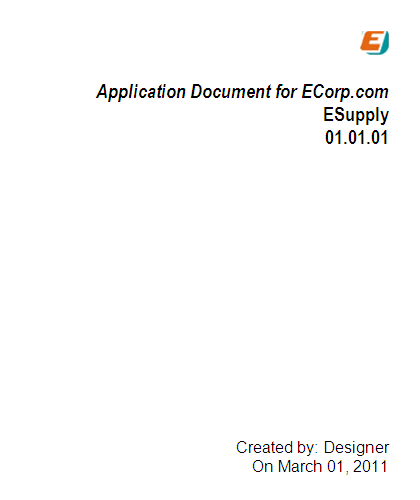
- Cover page — remove the Pegasystems image, update the main title to say 'Application Document for ECorp.com', add the ECorp logo image (
 ), remove the field code for the standard system-generated .pyAppLabel content, and remove the italic font on the remaining field code entries on the cover page.
 - Revise the text on the copyright page to reference ECorp and remove references to Pegasystems.
- Revise the default page header.
- Add page numbers to the footer to appear on all of the pages.
- Add a heading 'Intended Audience' before the Contents, and add a paragraph that describes ECorp's intended audience for the information in output documents that use your template. The text is static text, and the wizard's output document will include this text every time your custom template is selected in the Document wizard.
To achieve this goal, an ECorp designer follows the steps in the above section to create an ESupply_templates RuleSet and a MyApplicationDocument Word Template rule. Then, from the MyApplicationDocument rule, the ECorp designer follows these steps:
- Click Download File and save the file on the local (client) system.
- Browse to the saved file and double-click it to open it in Word. Select the image on the cover page and press the Delete key on the keyboard to remove the default image.
- Use Insert > Picture to insert the ECorp logo in place of the previous image.
- Set the cursor just before the first curly brace ({) on the cover page and type
ECorp.com. - Highlight the line that reads {pega:reference .pyAppLabel} and press the Delete key to delete that field code.
- Highlight the lines for the two remaining field codes and click the italics icon to turn off the italics font for those lines.
Now the top of the cover page looks like this in Microsoft Word:
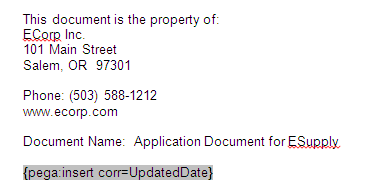
- On the copyright page, update the text to refer to the ECorp company:
- Display the existing headers by going to the Insert tab, clicking Header, and choosing Edit Header. While there is no header on the cover page, scrolling to the second page of the document shows the existing header.
The default header uses standard Microsoft Word field codes to set the header content, using the actual headings and page numbers when the document is created. ECorp wants to have the current date appear in the header. Put the cursor in the header and select the Insert tab, then Quick Parts > Field and select
Datefrom the Microsoft Word standard field codes. (For more about using field codes in Word, see the Microsoft Word online help.)
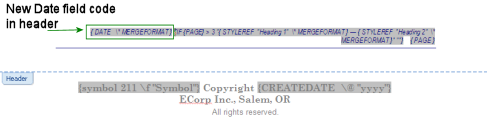
- The organization wants the page numbers in the footer rather than in the header, so cut the {PAGE} from the header. Then add it to the footer by selecting Footer > Edit Footer and pasting it into the footer area. Center the {PAGE} in the footer and then close the Header & Footer tools.

- Insert the cursor just after the {pega:insert corr=UpdatedDate} field code on the copyright page and press Enter to move to a new line.
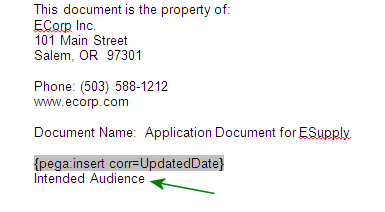
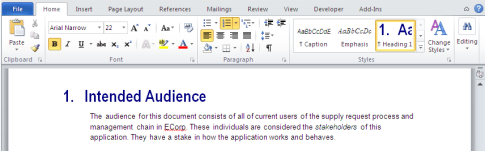
- Type the words
Intended Audience, and then apply the Heading1 style to the text. Type the text that the organization wants for this section.
- In Word, click Save to save the changes.
- In the rule form in the Designer Studio, click Upload File. Select the updated Word file on the local system and upload it to the rule.
- Click to save the updated Word file to the
MyApplicationDocumentrule.
Now, when the ECorp team members choose their customized MyApplicationDocument template in the wizard, the generated document includes the updates:
Custom cover page used in generated document:
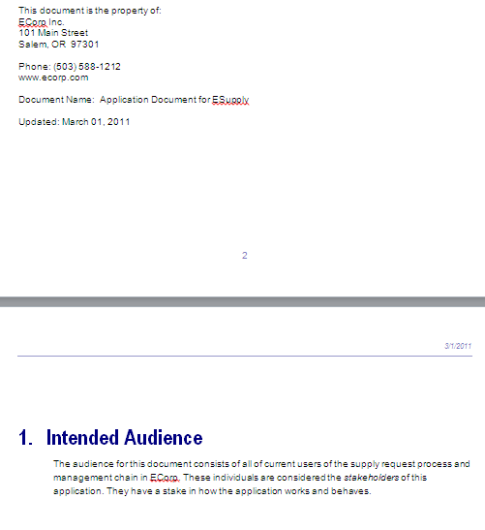
Custom copyright page used in generated document, with date in header instead of page number, and page number in footer:

The Intended Audience section follows the copyright page on page 2:
Summary
By using a custom document template, you can easily include custom static content in the output document, and customize things such as the headers and footers in the document, to meet your organization's needs.
For steps on advanced customizations, such as including system-generated content in the output document, see Extending the Document wizard.
Previous topic DCO 6.1 - Extending the Document wizard Next topic DCO 6.1 - Sharing and Merging Application Profiles