How to create a custom error section in user forms (6.2)
Summary
User forms display, by default, a standard section containing error messages when form-level errors occur. This article describes how to create a custom error section and display it when form or field-level messages occur. You can use your custom section to override the standard section, or display both sections at the same time.
Also described is how to use the Branding wizard to apply styles to the contents of your custom section.
For information about:
– Applying styles to error messages in 6.2+, see How to apply styles to user form error messages using the Branding wizard (6.2).
– Creating custom error sections and applying styles to field-level error messages in V5.X, see How to customize the presentation of errors on work object forms.
Suggested Approach
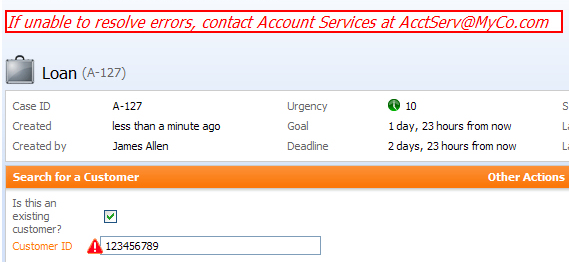
In this example, you will configure a section instructing users who to contact if they are unable to resolve any errors on the form. You want the message to appear for both form and field-level errors.
- Open the harness you want to add the error section to.
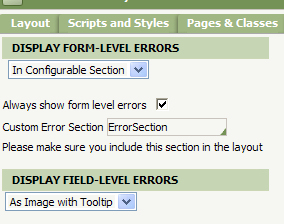
- On the Display Options tab. select
In Configurable Sectionin the Display Form-Level Errors field. - Select the Always show form level errors checkbox.
- In the Custom Error Section field, select or create a section rule that will display the error message.
Important: When you select this option, the custom error section overrides the standard section — the standard section will not appear. Therefore, make sure that you add your section to the harness layout as described below. Otherwise, noform-level error messages will appear.
If you want to display both the custom and standard sections, perform steps 1 through 4, and change the option toDefaultorTop of harness. - On the custom section's Layout tab, add one or more label fields in a layout, and enter the message text as shown in this example::

- Save the section and include it on the harness in the desired location.
- Open the Section Include properties panel.
- On the General tab, in the Visible When field, select hasMessages from @baseclass, and click OK.

To apply styles to the message, do the following:
- Open the Branding wizard from
 > User Interface > Branding Wizard.
 - In the Name and Location panel, select
modify an existing skinand an unlocked version of the skin you are modifying. Make sure that it is selected in your Designer Studio General Preferences dialog so that you can view your modifications during testing. - Navigate to the Custom panel.
- Add a row (
 ), and enter a name in the Style Name column.
 - Open the Style Editor (
 ) and enter your settings.
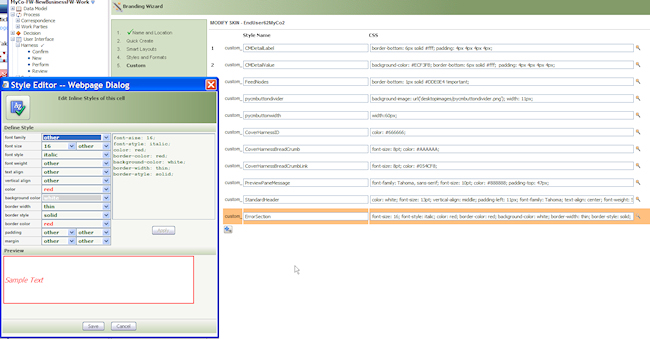
- Click Save to close the Editor.
- Click Save in the wizard, and leave it open for testing.
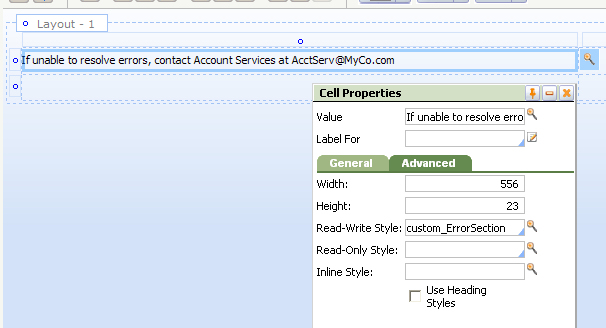
- Return to the custom section in the harness.
- Select the cell containing the message, open its Properties panel, and enter the style name in the Read-Write Style field on the Advanced tab.
- Save the harness and run your process to test.