How to include an image or link as a report column
Summary
Note: You can select from a list of images in binary file rules by choosing Tools > Image Catalog or you can upload and save your own images as Rule-File-Binary instances.
Suggested Approach
Note: Before you add an image or link to your report, create an activity and HTML section rule to display the target reference. See Creating the HTML stream to display in the target reference and Creating an activity for reporting_image and reporting_link HTML properties.
- Create or edit a list or summary view rule.
- For a list view, open the Display Fields tab. For a summary view, open the DrillDown tab and choose Detailed View.
- Locate the property that you would like to display as an image or with a link.
- In the HTML Property field of the property row, choose reporting_image or reporting_link from the dropdown list.
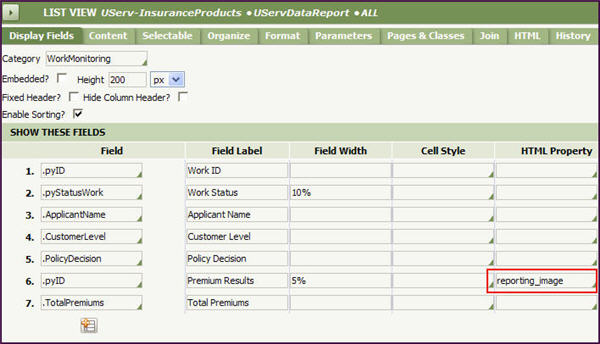
- Click the Display Formats icon (
 ) located to the right of the HTML Property field.
 - In the Value fields, enter the
ImageSourceName(reporting_image HTML property only) - name and location of the image file to display in the reportActivityName- the name of the activity that is called when the image or link is clicked.ActivityClassName- the class name of the activityTarget- the name of the window. In addition, the following values can be used:_blank- the HTML is loaded into a new, unnamed window_parent- the HTML is loaded into the current frame's parent. If the frame has no parent, this value acts like the value "_self"_self- the current document is replaced with the specified HTML_top- the HTML replaces any framesets that may be loaded. If there are no framesets defined, this value acts like the value "_self"
- Click the Display Formats icon (
Note: You can specify the size and other characteristics of the display using the remaining parameters.
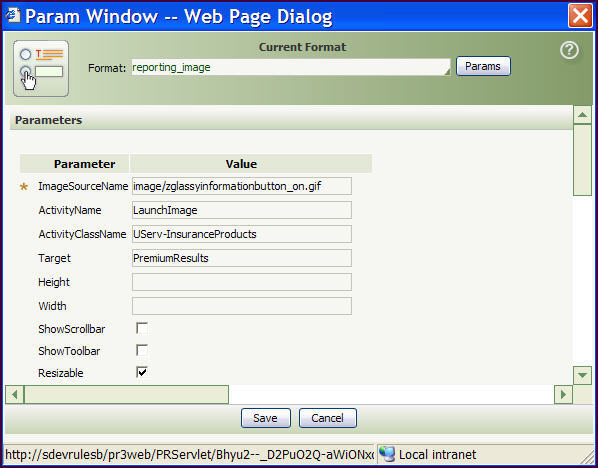
- Click Save in the Param window.
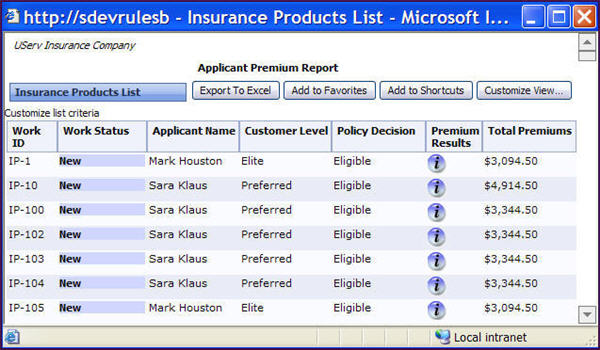
- Click the Save toolbar button. .
- Click the Run icon. The view displays with the column of images or links, in the figure the column is Premium Results.
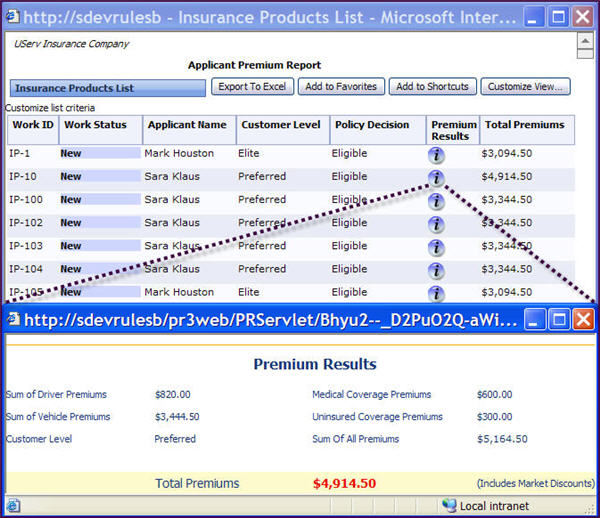
- Click an image or link and the target reference opens.
Creating the HTML stream to display in the target reference
To define the HTML stream to display when the user clicks an image or link, use the steps described in the following example:
- Create a new HTML rule.
- Enter the HTML stream source code.
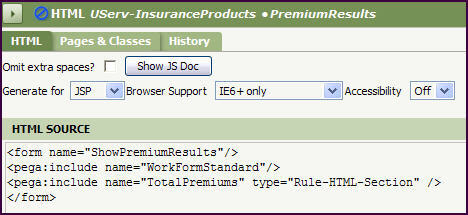
- Click the Save icon.
Creating an activity for reporting_image and reporting_link HTML properties
To define a new activity to be called when the image or link is clicked, use the steps described in the following example as a guide. These steps were used to create the report in this article.
- Create a new activity rule, in this example, LaunchImage.
- In the Parameters tab, enter any parameters you may be passing to the activity, in this example, pyID.

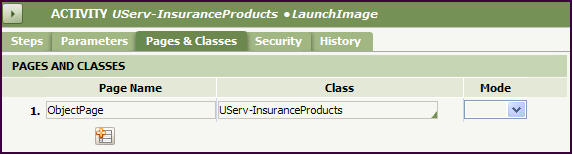
- In the Pages & Classes tab, enter the page name and it's class, in this example, ObjectPage.
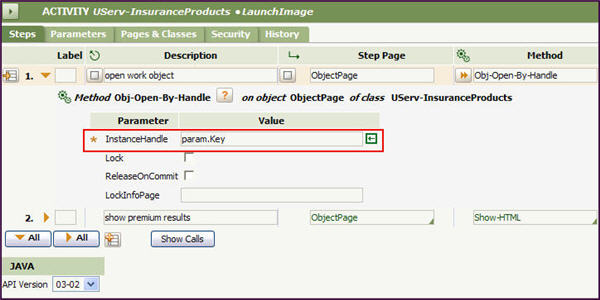
- In the Steps tab, specify a method that opens the work object using its pzInsKey, in this example, Obj-Open-By-Handle.
- Expand Step 1. In the InstanceHandle field, enter param.Key.
- Specify a method that displays the HTML in the target window, in this case, Show-HTML.
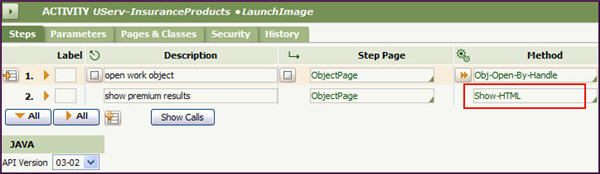
- Expand Step 2. In the HTMLStream field, choose the name of the HTML section rule from the SmartPromt list, in this example, PremiumResults.
- Enable Read Only.
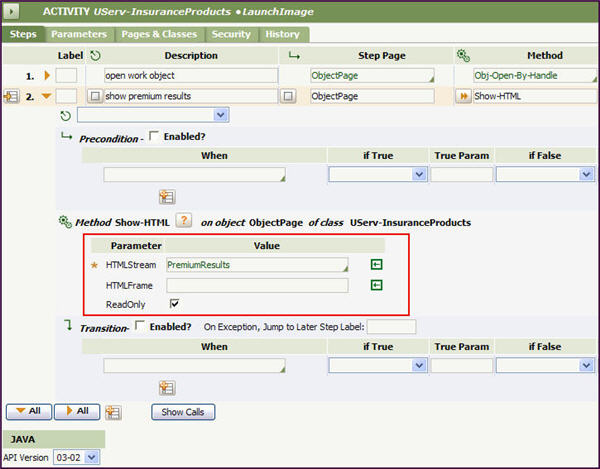
- Click the Save toolbar button.