Migrating Applications with the Application Packaging Wizard
Summary
Use the Application Packaging wizard to create a product rule containing all the classes, rules, and data that make up an application.
The wizard presents a page for each of the components that make up a complete Process Commander application. On each page you can review the instances associated with the application and remove any that you do not want to include in the product rule. On the final step of the wizard you can open the product rule to modify it further, export the application package to an ZIP file that can be imported into another Process Commander system, or open the Product Migration wizard to migrate the product directly to another server.
The Application Packaging Wizard collects and allows you to review the following application components. Details for using each page are given in the next section.
- Application
Specify the application you want to export and the RuleSet and Version in which to create the Product rule. - Application Stack
Check the built-on applications in your application stack that you want to include in your application package. - Organizational Elements
Review the Organizational Elements (Organizations, OrgDivisions, and OrgUnits) associated with your application. - Access Groups
Specify the Access Groups you want to include in your application package. - Operators
Specify the Operators you want to include in your application package. - Work Baskets
Specify the Workbaskets you want to include in your application package. - Work Groups
Specify the Work Groups you want to include in your application package. - Data Tables
Lists Data Tables generated by the Data Model > Data Tables wizard. Specify the Data Tables you want to include in your application package. - Database Storage
Specify the database Names and Tables you want to include in your application package. - Integration Resources
Specify the Integration Resources you want to include in your application package.
When you have completed your selections, click Finish. The final page of the wizard provides the following options:
- Preview - Review the contents of the product rule.
- Modify - Open the Product rule form to add or remove particular instances.
- Export - create an application archive that can be imported into another Process Commander system. The application jar is saved to the directory you specified as the explicittempdir in your Process Commander configuration, within the StaticContent/global/ServiceExport subdirectory.
- Migrate - Open the Migration Wizard to load the product directly into another Process Commander system.
Details for each type of component are given in the next section.
Suggested Approach
Click ![]() > Application > Import & Export > Package to launch the Import wizard:
> Application > Import & Export > Package to launch the Import wizard:
The wizard uses three methods to identify the components associated with the selected application:
- Uses the Application RuleSet list to identify the Application's Classes and then the Class Groups, DB Table and DB Name.
- Uses the Access Groups that list the application to identify Operators and through them the Work Groups, Work Baskets and Organizational Structure (Unit, Division, Organization.)
- The wizard displays all the Integration Resources in the system (such as listeners, email accounts, and service packages), but pre-selects instances to be included in the package that have their Associated RuleSet set to one of the RuleSets in the selected application's RuleSet stack. Newly created instances of these data objects are automatically associated with a RuleSet from the current application. (For Integration resources created in versions earlier than 6.2, the Associated RuleSet field is blank. To include them in the package, you must each data instance, complete the Associated RuleSet field, and save.)
The wizard displays a page for each type of component, to allow you to review and adjust which instances are to be included in the application package.
Step 1. Application
Select the application that you want to package.
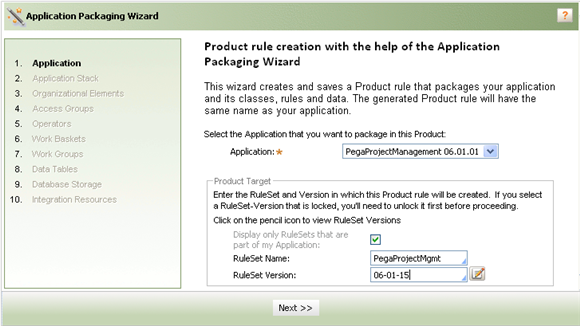
Select the application to export. The Application drop-down contains the applications on the current Process Commander system that you have access to.
Select the name of the RuleSet and the RuleSet Version to which the product rule will belong. By default, the RuleSet Name drop-down lists the RuleSets that are part of the selected application. If you want to use a RuleSet that is not part of the currently selected application, uncheck Display only RuleSets that are part of my Application.
You must select an unlocked RuleSet Version. If the version you select is locked, can use the Edit button next to the dropdown to open the RuleSet Version and unlock it.
If you select a RuleSet Version that is in the application you are packaging, the newly created Product rule itself will be part of the package.
Step 2. Application Stack
Check the built-on applications in your application stack that you want to include in your application package.
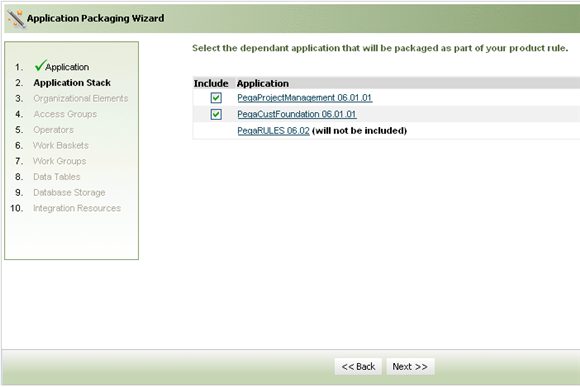
The page lists your application, the application it is built-on, and other applications in the built-on chain ending in the base PegaRULES application.
If the built-on applications are present on the target system to which you are moving your application, you may not need to include the entire stack in your package. However, you should be sure that all the applications your application depends on are available on the target system. To have a completely self-contained package, include all the applications in the stack.
Step 3. Organizational Elements
Review the Organizational Elements associated with your application and specify which you want to include in your application package.
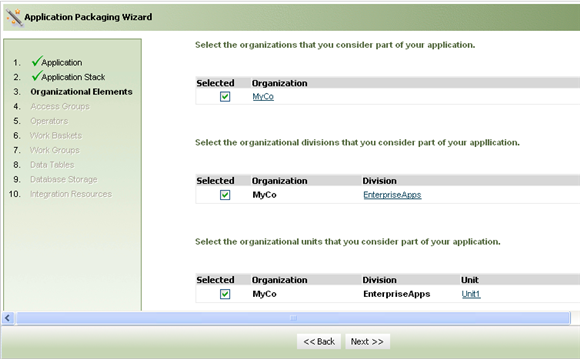
The elements are listed in three sections:
- Organizations
- OrgDivisions
- OrgUnits
Click the bar in each section to display its entries.
By default, all listed entries are included. To exclude an entry, uncheck its checkbox. Instances you do not exclude are included in the package and will be imported with the package into the target system
This page lists organizations, divisions and units that are associated with the operators that have been identified for the selected application.
Step 4. Access Groups
Identify the Access Groups associated with your application and specify which you want to include in your application package.
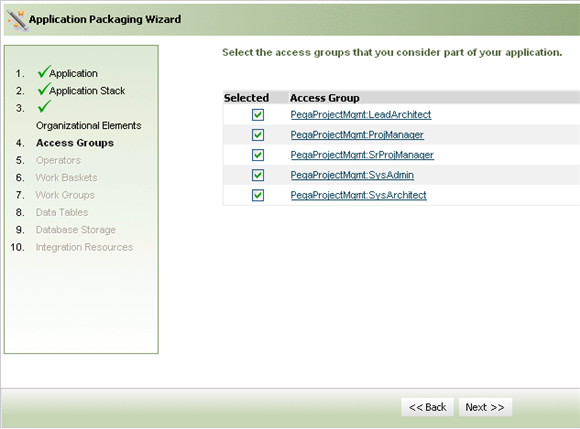
By default, all the listed access groups are included in the product. To exclude an entry, uncheck its checkbox. Instances you do not exclude are included in the package and will be imported with the package into the target system.
You can click the name of the access group to open it, to review or modify the instance before packaging it.
This page lists all access groups in the system which have the selected application listed as their default application.
Step 5. Operators
Identify the Operators associated with your application and specify which you want to include in your application package.
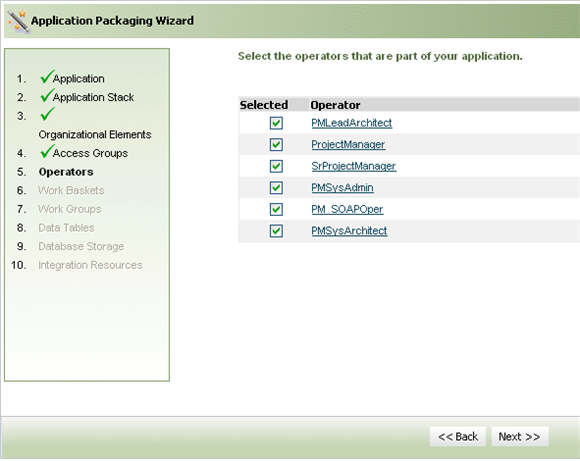
By default, all the listed Operators are included in the product. To exclude an entry, uncheck its checkbox. Instances you do not exclude are included in the package and will be imported with the package into the target system.
You can click the name of the Operator to open the Operator ID rule form (Data-Admin-Operator-ID) to review or modify the instance before packaging it.
This page lists any Operator IDs that includes one of the access groups that have been identified for the selected application in their Access Groups list.
Step 6. Work Baskets
Identify the workbaskets that are associated with your application and specify which you want to include in your application package.
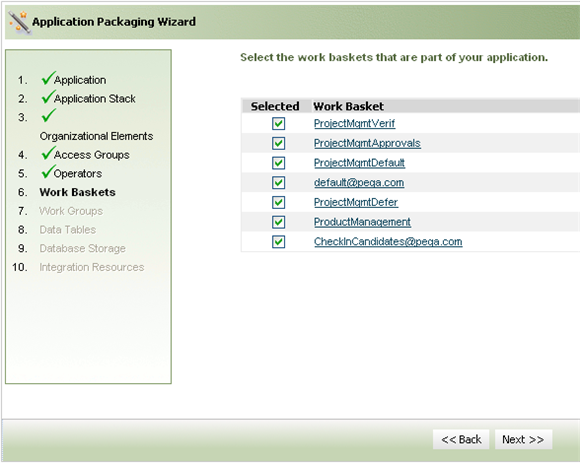
By default, all the listed workbaskets are included. To exclude an entry, uncheck its checkbox. Instances you do not exclude are included in the package and will be imported with the package into the target system.
You can click the name of the work basket to open it, to review or modify the instance before packaging it.
This page lists workbaskets associated with the Work Groups and Operators identified for the application.
Step 7. Work Groups
Identify the work groups that are associated with your application and specify which you want to include in your application package.
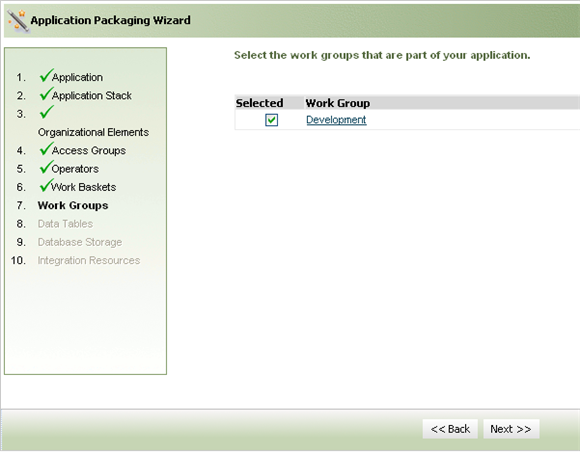
By default, all the listed work groups are included. To exclude an entry, uncheck its checkbox. Instances you do not exclude are included in the package and will be imported with the package into the target system.
You can click the name of the work group to open its rule form (Data-Admin-WorkGroup) to review or modify the instance before packaging it.
The page lists Work Groups that are assigned to any of the Operator IDs identified for the selected application.
Step 8. Data Tables
Identify the Data Tables that are associated with your application and specify which you want to include in your application package.
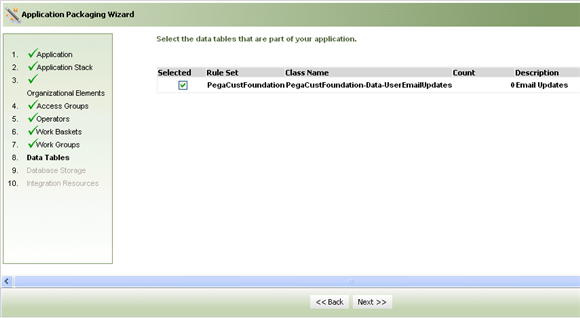
By default, all the listed Data Tables are included. To exclude an entry, uncheck its checkbox. Instances you do not exclude are included in the package and will be imported with the package into the target system.
This page lists Data Tables generated by the Data Model > Data Tables wizard. ![]() About the Data Table wizard
About the Data Table wizard
Step 9. Database Storage
This page lists database Names and database tables associated with your application.
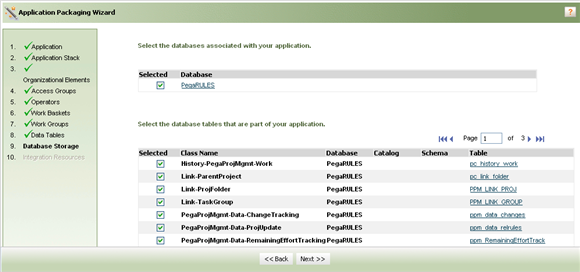
Identify the database Names and Tables that are associated with your application and specify which you want to include in your application package.
By default, all the listed instances are included. To exclude an entry, uncheck its checkbox. Instances you do not exclude are included in the package and will be imported with the package into the target system.
You can click the name of the Database or Database Table to open its rule form to review or modify the instance before packaging it.
Step 10. Integration Resources
This page lists the Integration Resources defined in your system. Instances that have an Associated Ruleset set to one of your application's RuleSets are automatically selected to be included in your application package.
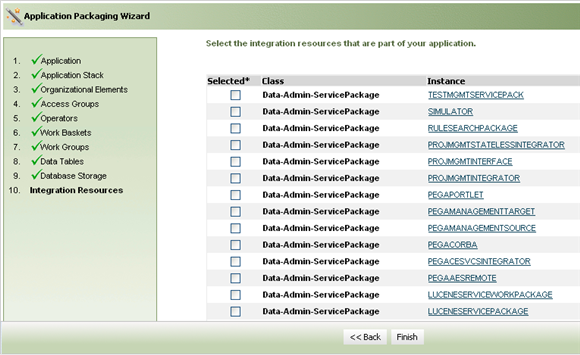
Identify the database Integration resources that are associated with your application and check those you want to include in your application package.
You can click the name of an instance to open its rule form (Data-Admin-Service-Package) to review or modify the instance before packaging it.