Tutorial: Merging branches
Branches are containers for rulesets. You can use branches to work on an application in parallel with other development teams. Branches allow you to perform development work within an isolated space (the branch) without affecting functionality in the base ruleset branch or other teams’ development changes. After development is completed, branches can be merged with each other and into the base ruleset branch.
You can use the Merge Branches wizard to merge multiple branches into base rulesets at one time. For example, your team can use one branch to fix bugs and another branch to develop a feature for the application. After development is completed on both branches, you can then merge them into the base rulesets.
Requirements
Before starting this tutorial, your development environment must be correctly configured:
- Your development environment must use branches and branch rulesets. For more information, see the help topic Using branch rulesets and merging branches for parallel development and the PDN article Tutorial: Using branches for parallel development, which describes how to configure your environment.
- You must have at least one development branch that is based on your development application.
- You must check in all rules to the branch ruleset before merging.
Merging branches
To merge branches:
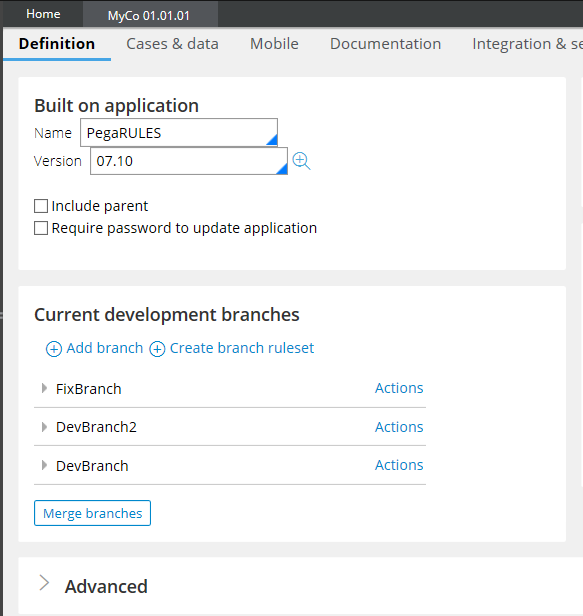
- Open the application rule for your development application that contains the branch.
Optional. If you plan to delete the branch and branch rulesets after the merge, you can package your branches before you merge to keep a copy of the rules in your branch. Select in the application rule.
Click the Definition tab, and then click .
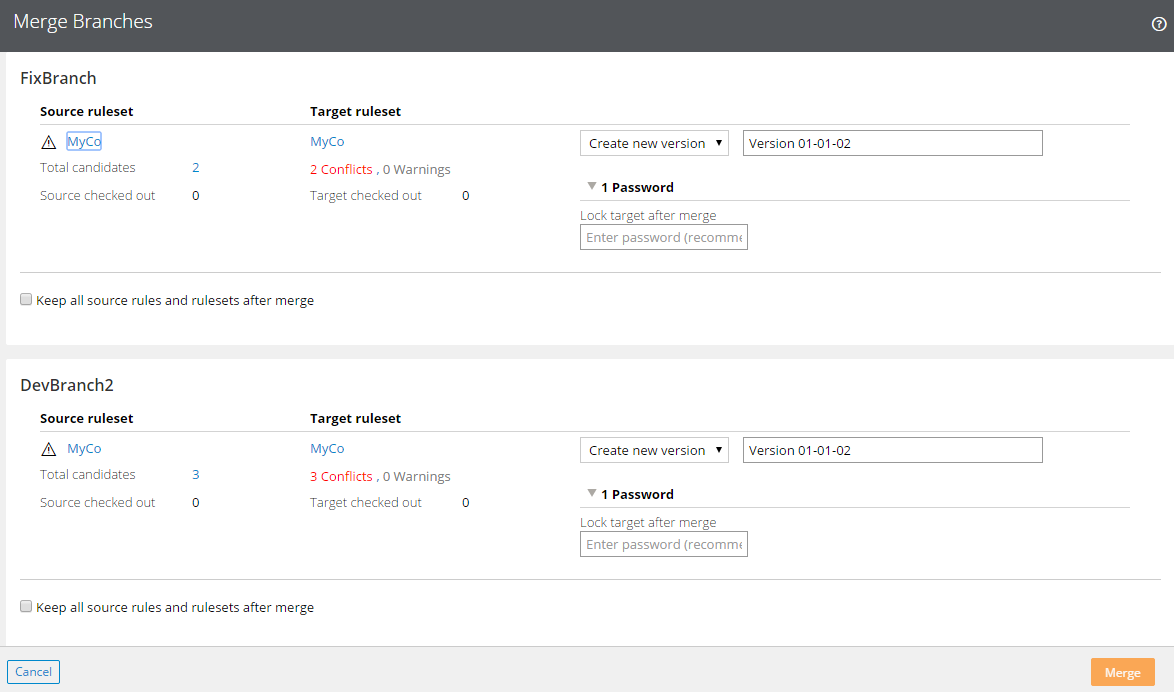
Select the branches you want to merge and click .

If there are issues with the merge, the wizard displays the number of conflicts and warnings in the Target ruleset area. You must resolve conflicts before you can merge the branches. For more information about conflicts and the wizard, see the help topic Conflicts and warnings in the Merge Branches wizard.
Click the displayed number of conflicts and warnings to open the Conflicts and Warnings window.
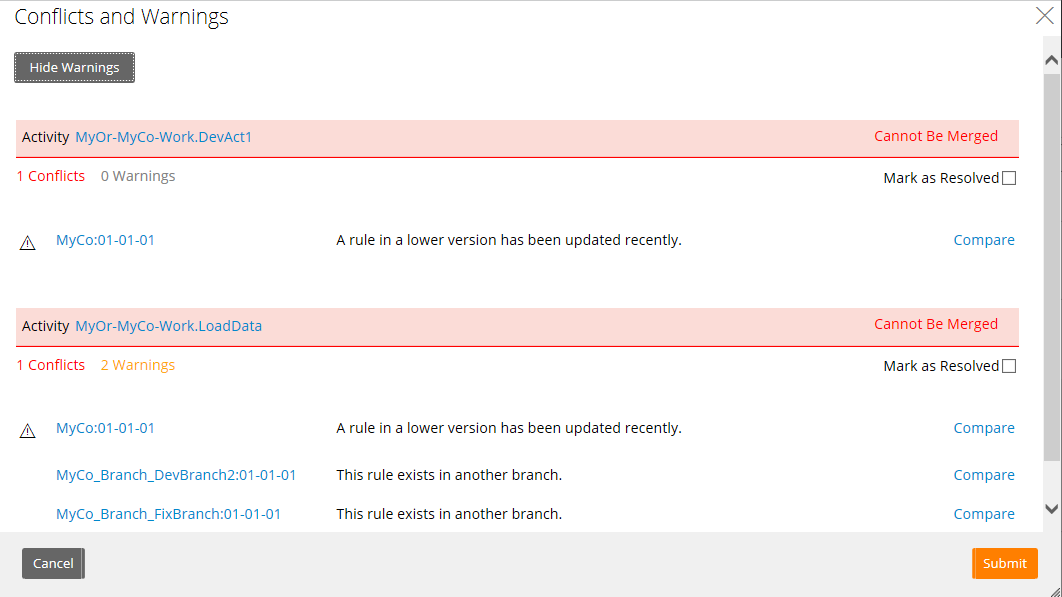
To examine your conflicts, you can the following actions:
Click next to the first conflict to examine the differences between your branch copy of the rule and the one in the base ruleset.
Click the ruleset name to open the base rule and directly examine it.
Resolve the conflicts, and then select the Mark as Resolved check box. If you are merging multiple branches, you must resolve conflicts in all branches before you can merge.
Click .
In the Merge Branches wizard, select from the menu whether you want to merge your branch into a new version or to use an existing ruleset version.
In the Password field, enter the appropriate password if it is required. Depending on the target ruleset version that is selected, one of five password types are displayed.
For example, the Target version field appears when you merge rules into a locked ruleset version.

- Optional. Select the Keep all source rule and rulesets after merge check box to retain all the branch rulesets and their rules after you have merged the rules into the base rulesets.
The default setting and recommended practice is to delete the branch and branch rulesets after a successful merge. You can keep a copy of the branch and branch rulesets by packaging the rules before merging (see step 2).
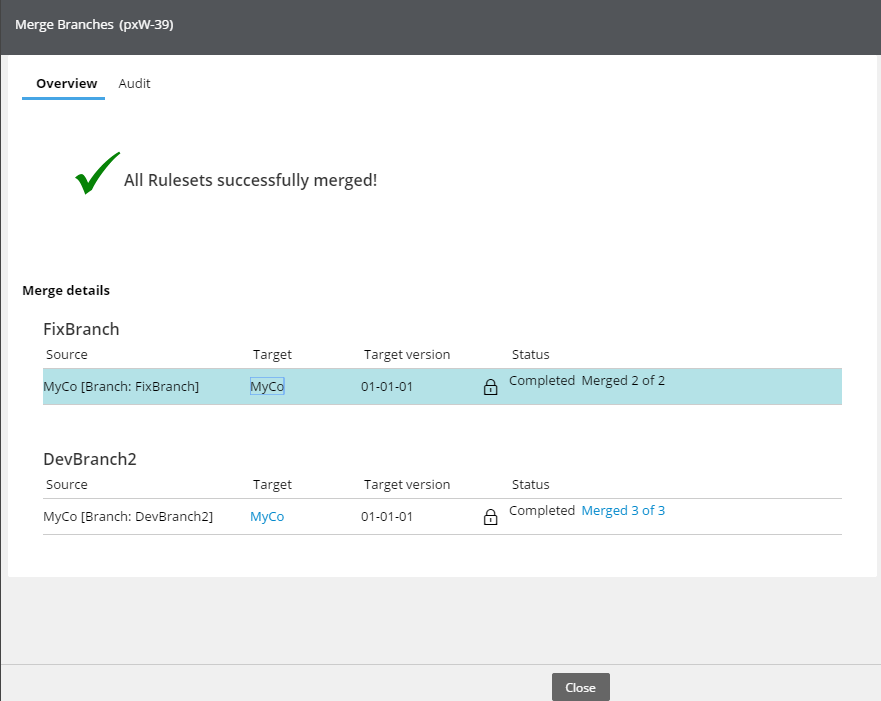
- Click . The final wizard window displays the merge details.
Previous topic Using Branch RuleSets and Merging for Parallel Development Next topic Tutorial: Using branches for parallel development