Displaying a list of recent items in your application
Beginning with Pega® 7, you can view a list of the most recently accessed cases, rule or data instance records, Create New and Save As forms, landing pages, wizard items, and instance lists in your application. This list provides a way for you to easily view and open recent items.
To see the default format and styling of recent items, see the Designer Studio Recent Explorer:
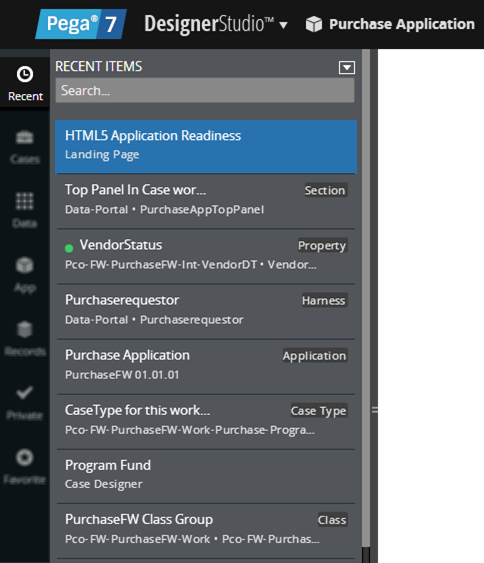
Recent Items list
You can customize the data, format, and number of items that are displayed in the Recent Items list.
Displaying a list of recent items in your application
To display a list of recent rules, cases, landing pages, and wizards in your application:
- Include pxRecent in a section in your application
- Enable tracking of recent items by including the PegaRULES: TrackRecents access role
To do this:
- Open an existing section or create a section in your application. See the PRPC Help for information about working with sections.
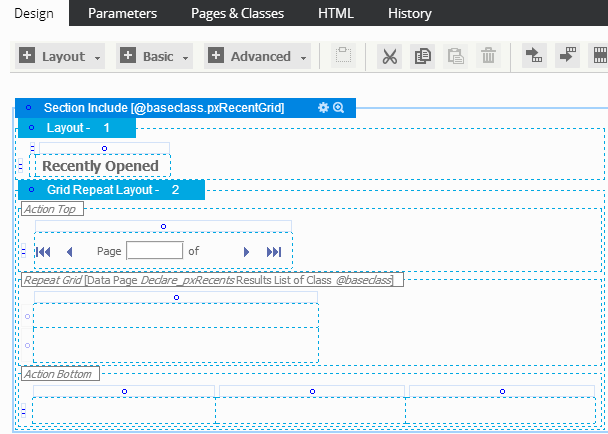
- On the Design tab, click and then select .
- Drag the section to the desired location, and then release the mouse pointer. The Section Include dialog box is displayed.
- In the Section Include dialog box, enter pxRecent in the Section field.

- Click OK. The pxRecent section is included:
- Save the section.
- Enable tracking of recent items by including the PegaRULES:TrackRecents access role.
Your application is now configured to display the 20 most recently accessed rules, cases, landing pages, and wizards. You can customize the Recent Items list.
Customizing the Recent Items list
You can customize the display of the Recent Items list by modifying the following elements:
- content that displays in the list (work, rules, landing pages, and wizards are the default)
- number of items in the list
- style of the list
- data and label that display in the list
If you want to customize the Recent Items list, save a copy of the pxRecent section in your ruleset, and then make the modifications. that you want
Save a copy of pxRecent in your RuleSet
To customize the Recent Items list, save a copy of the pxRecent section in your RuleSet:
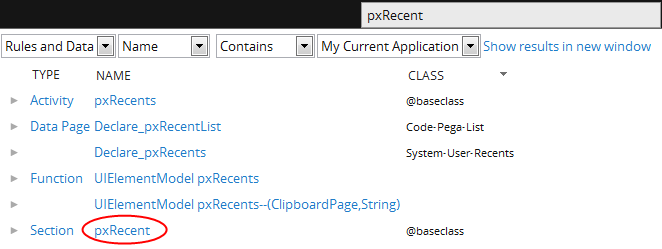
- Enter pxRecent in the Search bar, and then press Enter.

- In the Search results, select the pxRecent section.
- In the pxRecent section, click Save as, and then specify the Applies to class and RuleSet version into which you want to save the section. Do not change the Purpose field.
- Click Save as.
Display rules, work items, or both in the Recent Items list
By default, items within both the Work- and Rule- classes are displayed in the Recent Items list. However, you can easily display only rules or only work items in the Recent Items list.
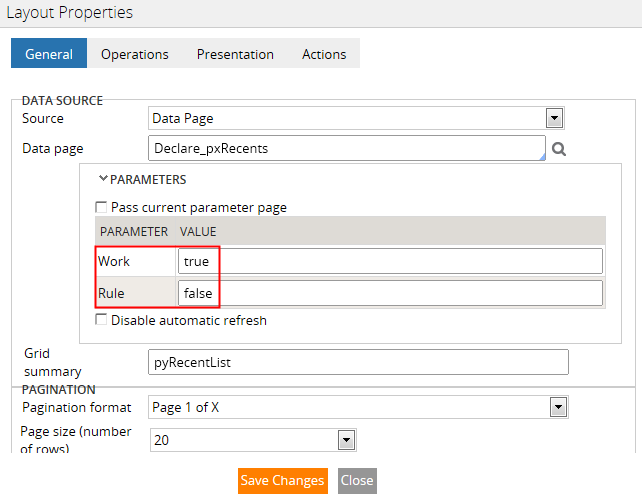
- Click the Gear icon
 in the Grid Repeat Layout header of the pxRecent grid to open the Layout Properties panel.
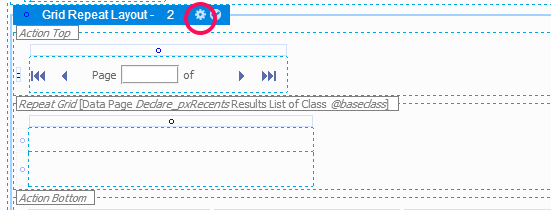
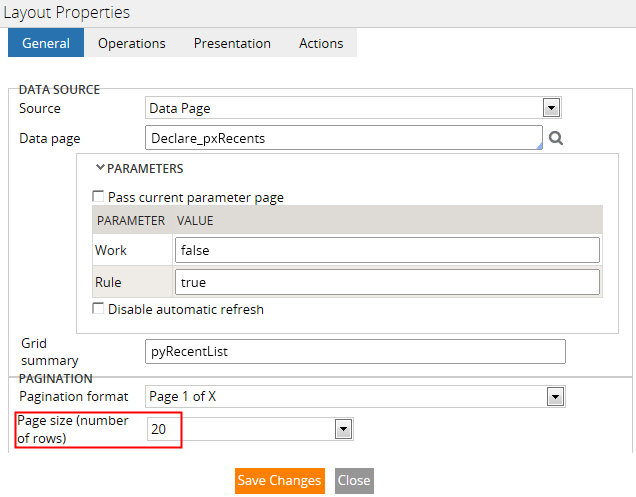
- On the General tab of the Layout Properties panel, modify the data page parameter values as needed. For example, if you want to display only items in the Work- class in your Recent Items list, enter false as the value for the Rule parameter and save your changes.
Modify the number of items that are displayed
To modify the number of items that are displayed in the Recent Items list:
- In the pxRecent section, click the Gear icon in the Grid Repeat Layout header of the pxRecent grid to open the Layout Properties panel.
- On the General tab of the Layout Properties, specify the number of items that you want to display in the Recent Items list in the Page size (number of rows) field. In this case, up to 20 items are displayed in the Recent Items list.
- Click Save changes.
As a best practice, ensure that the number that you specify as the Page size (number of rows) is the same number specified in the Maximum Documents field of the dynamic container used in the portal. A system setting, Pega-UIEngine.pyMaxRecentsCount, controls the maximum number of items tracked per user. The default maximum is 30 items per user.
Changing the style of the list
You can change the style of items in the Recent Items list by:
- Selecting another grid style from the skin
- Modifying an existing grid style in the skin
- Defining and applying an additional grid format
Select another grid style from the skin
You can change the style of the Recent Items list by referencing another grid style format in the skin:
- Click the Gear icon in the Grid Repeat Layout header of the pxRecent grid to open the Layout Properties panel.
- On the Presentation tab, select a format in the Style field. To select a custom style format defined in the skin, select Other in the Style field, and then specify the format.
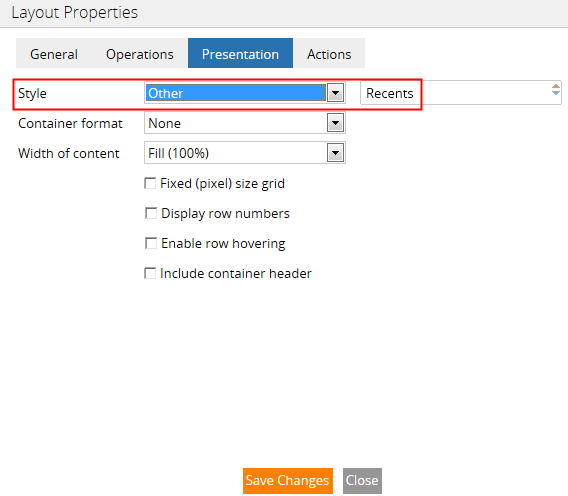
- Click Save Changes.
Modify an existing grid style in the skin
You can change the style of the Recent Items list by modifying the style in the skin rule. For information about determining the skin in use, see Associating a skin with the user interface.
You can use the UI Inspector to determine the style applied to the Recent Items list. See How to use the UI Inspector tool.
To modify the grid style applied to the Recent Items list:
- Open the appropriate skin. See Associating a skin with the user interface to determine the skin in use.
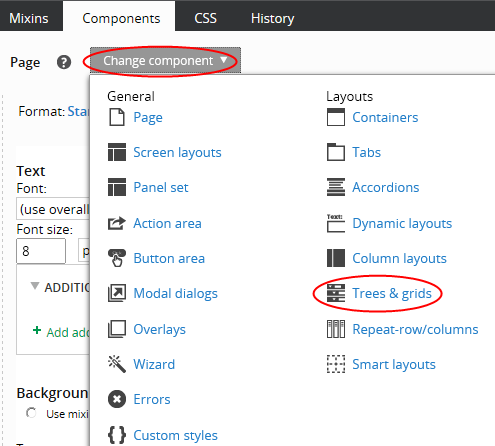
- Select the Components tab, and click Change component.
- In the Layouts area, select Trees & grids.
- Modify the styles as needed and save the skin.
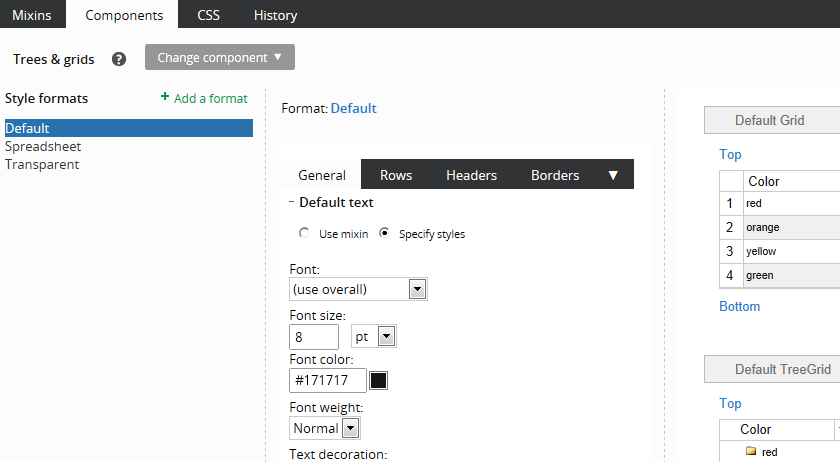
Define a custom grid format
If the existing grid formats do not meet your needs, you can create a custom grid format and apply it to the Recent Items list grid.
To do this:
- Open the appropriate skin.
- Select the Components tab, and click Change component.
- In the Layouts area, select Trees & grids.
- Click Add, and then enter the name of the grid format that you want to create.
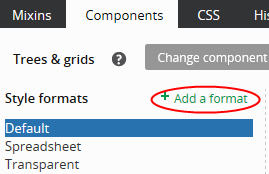
- Define the styles and save the skin.
- Open pxRecent. In the Grid Repeat Layout Properties panel, select Other in the Style field, and then specify the custom grid format that you created.
- Save the section.
For more information, see Creating multiple style formats in the skin.
Customizing the data and label that are displayed in the list
To change the information that is displayed in the list of recent items at run time, you can extend the label section, pxRecentLabel.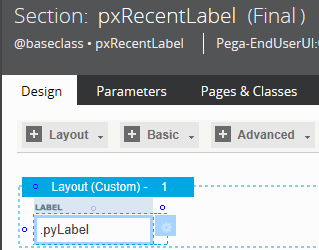
For example, you might want to display both the claimant's name and the claim number in the Recent Items list: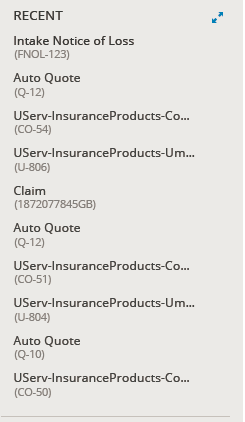
You can add fields to the Recent Items list by extending the pxRecentLabel section. For example, you can choose to include the rule description, followed by a second line that contains the rule type and rule name, separated by a pipe character, as shown in the following figure.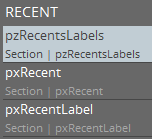
To extend pxRecentLabel, save a copy of the pxRecentLabel section in your ruleset, and then make the modifications.
Using Pega 7, you can display a customized list of recently accessed items and enable users to open items from this list. For more information about presenting lists in PRPC, see the PRPC Help.
Additional information
Associating a skin with the user interface